

I hope you enjoy reading this blog post.
If you are looking professional golf manufacturer.
Analysis Of Common Mistakes Beginners Make When Playing Golf: A Comprehensive Interpretation From Movements To Mindset
November 10th, 2025
Golf is famous for its elegance and skill. But for beginners, this learning path is full of thorns. From the swing action to the mental state, a slight mistake can lead to falling into the “trap” of common errors. It affects the hitting effect and learning experience.
Next, these issues will be analyzed in depth. And provide corresponding correction methods, while sharing some practical tips and precautions. Help beginners better avoid misunderstandings and quickly improve their ball skills.
Grip Mistakes: Seemingly Simple, But Actually Full Of Hidden Secrets
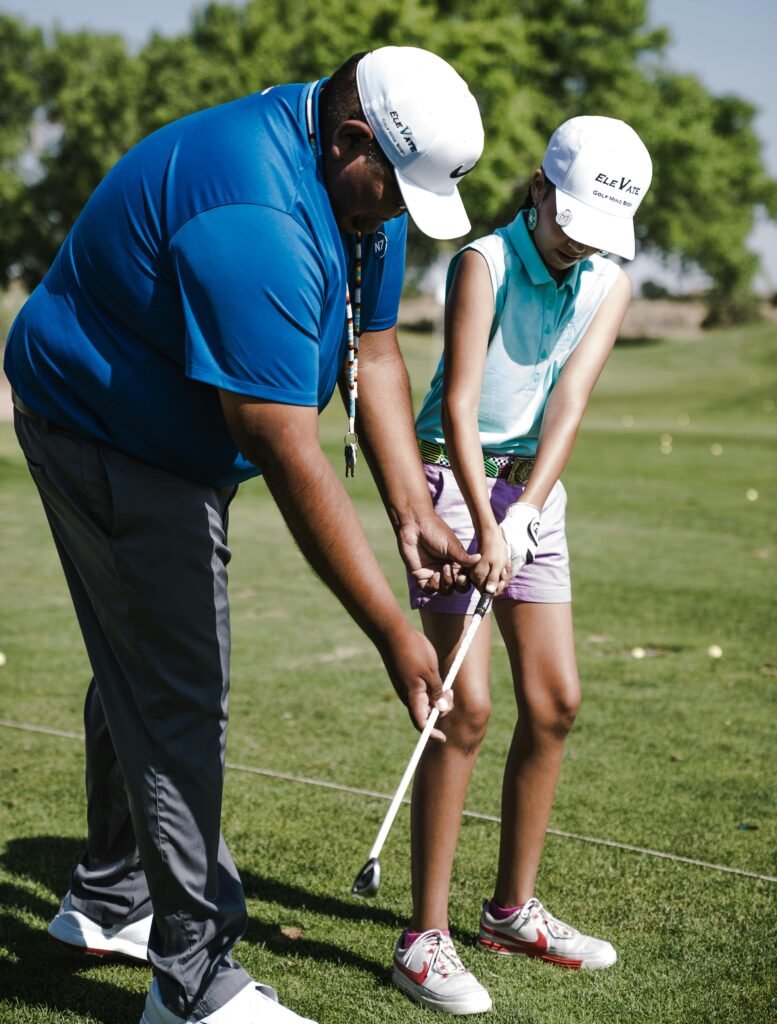
Holding the club, as the starting step of a golf shot, seems simple, but it is actually the source of many beginners’ mistakes. The most common problem is holding the club too tightly. They are worried that the club will slip during the swing. It held tightly as if grasping at a lifeline.
Little do they know that this kind of tight grip will keep the muscles of the hands and arms in a tense state. It severely limits the flexibility when swinging the club. Just like a bird that is bound and unable to soar freely, stiff muscles prevent the smooth transmission of strength. When hitting the ball, not only is the distance greatly reduced, but it is also difficult to precisely control the direction. The originally expected perfect shot also came to nothing.
Correction method: It can be improved by practicing a relaxed grip. First, gently hold the club and feel the contact between your fingers and the club. It should be just enough to hold the club without it dropping.
You can also try single-handed club practice, lifting the club with your non-dominant hand. Hold for 10 to 15 seconds to feel the appropriate grip force. Relax your hand muscles as much as possible without dropping the club. Repeat many times and gradually form the correct memory of the grip force.
Practical tip: When holding the club, the left thumb should be placed slightly to the right of the center line of the club grip (for right-handed players). This can better control the direction of the club face when hitting the ball. When holding the bar with the right hand, make sure the small fingertip is in contact with the thumb of the left hand, and use both hands to exert force together.
Note: Before each practice, first check whether the grip posture is correct. Avoid wrapping too much grip tape around the handle to prevent affecting the grip feel and the accuracy of the grip.
Apart from the issue of grip force, incorrect grip position is also a common occurrence. Some beginners hold the club too high, which shortens the effective length of the club and makes it difficult to apply sufficient force when hitting the ball.
If the grip is held too low, it will change the center of gravity of the swing and disrupt the coordination of the entire swing. This led to a deviation in the direction of the shot, making the originally aimed target seem out of reach.
Correction method: You can first locate the marking line or specific mark on the cue handle and align the root of your left palm with the mark. Make sure the knuckles of the left index finger are in the appropriate position above the club.
When holding the bar with the right hand, insert the little finger of the right hand between the index and middle fingers of the left hand. The combination of both hands forms a natural sense of oneness.
Beginners can practice holding the bar in front of a mirror and observe whether their grip posture is correct. You can also ask the coach or experienced players to help check and correct it.
Practical tip: Practice the transition of holding different clubs and feel the subtle differences in holding due to the varying weight of the club head and the length of the club body. Replace the grip regularly to maintain its friction and comfort.
Note: Do not frequently adjust the grip position to avoid disrupting the continuity of the movement. If your hands tend to sweat easily, you can use sweat-absorbing bands or anti-slip gloves.
Improper Standing Posture: Unstable Foundation, Affecting The Overall Situation

Standing posture is like the foundation of a tall building. If there is a problem, the entire hitting movement will be affected. Unreasonable foot spacing is a common standing posture mistake for beginners.
When the distance between the feet is too wide, the rotation of the body will become clumsy and slow. Just like a dancer bound by heavy chains, unable to complete the swing freely.
If the distance between the feet is too narrow, it is difficult to maintain the balance of the body during the swing. Just like a slender bamboo swaying in the wind, it may lose its center of gravity with the slightest exertion. This causes the ball to wobble when hitting the ball, and accuracy is out of the question.
Correction method: Taking the No. 5 iron rod as an example, it is a more appropriate starting position to stand with feet shoulder-width apart. Beginners can mark two parallel lines as wide as their shoulders on the ground when practicing. Step your feet on two lines respectively and practice your standing posture repeatedly.
The stability of the body can also be enhanced through some balance exercises. For example, for single-leg standing practice, stand for 30 seconds to 1 minute each time. Alternate between the left and right feet to enhance the body’s perception and control of balance.
Practical tip: When standing, slightly bend your knees. Maintain the elasticity of the body to facilitate the exertion of force and adjustment of the center of gravity when swinging the club. Slightly spreading your toes outward by 10 to 15 degrees can help your body rotate and exert force.
Precautions: Avoid excessive forward or backward leaning of the body when standing, and keep the spine naturally straight. Adjust the distance between your feet appropriately according to different clubs and hitting scenarios. When serving with a wooden club, the distance between your feet can be slightly wider than your shoulders.
Uneven distribution of the body’s center of gravity is also a problem that cannot be ignored. Some beginners are accustomed to tilting their center of gravity too far forward, and thus cannot effectively utilize the rotation of their body and the shift of their center of gravity to exert force when swinging.
However, if the center of gravity shifts too far backward, it will cause a lack of sufficient support force at the moment of hitting the ball. All these will greatly reduce the power and effect of the shot, making each shot seem weak and powerless.
Precautions: Avoid excessive forward or backward leaning of the body when standing, and keep the spine naturally straight. Adjust the distance between your feet appropriately according to different clubs and hitting scenarios. When serving with a wooden club, the distance between your feet can be slightly wider than your shoulders.
Correction method: You can stand against the wall with the back of your head, shoulders, hips and heels touching the wall. Feel the state where the center of gravity of your body is evenly distributed on your feet, and then maintain this sense of center of gravity to practice standing posture.
In actual hitting practice, first perform an empty swing without the ball to experience the process of the center of gravity shifting from the back foot to the front foot, ensuring a smooth transition of the center of gravity and smooth force application.
Practical tip: When standing, imagine your body’s center of gravity is about 10 centimeters below your navel, and keep this center of gravity stable. When practicing, you can place a balance board under your feet to increase the difficulty of training your center of gravity control.
Note: Do not suddenly change the position of the center of gravity at the moment of hitting the ball. Maintain the continuity of the center of gravity transfer. Wearing suitable golf shoes, whose studs can provide better grip and assist in center of gravity control.
Failure To Reach The Bar: Disordered Rhythm And Limited Power

During the climbing session, beginners tend to fall into the trap of climbing too fast. They couldn’t wait to complete the hitting action, but neglected the rhythm and balance of the shot. The overly fast climbing speed leaves the body no time to adjust to the best condition. Just like an out-of-control car that loses its direction in a curve.
Not only does it cause the swing movement to deform, but it also makes the muscles overly tense due to the sudden exertion of force. The power that could have been generated through body coordination was greatly reduced, and the final hitting distance and quality were both unsatisfactory.
Correction method: Conduct slow pole climbing practice during the practice process. Count “1-2-3” silently and complete the pole movement in three beats. Feel the rotation of your body and the lifting of your arms, and gradually master the rhythm of climbing the bar. It can also be done during practice.
Break down the upper pole movement into several parts and practice them respectively. For example, practice turning your shoulders first, and then practice lifting your arms. Finally, combine the two and gradually master the correct upward movement.
Practical tip: When taking the shot, keep your eyes on the ball all the time and keep your head stable. While the shoulders rotate, the arms and the body form a relatively fixed triangle, which helps maintain the stability of the swing.
Precautions: Avoid excessive twisting of the waist when climbing the bar to prevent injury to the waist. When reaching the top of the pole, do not pause for too long and keep the movement smooth.
On the other hand, insufficient upward movement is also a common problem. Due to unproficiency in the movements or the fear of making mistakes. Beginners dare not fully rotate their bodies and arms, which limits the range of motion for ascending the bar.
This is just like a bowstring that has not reached its maximum tension, unable to hit the ball with sufficient force. The hitting distance is naturally limited, making it difficult to achieve the desired effect.
Correction method: You can place a marker behind you, such as a plastic bottle or a small flagpole. When climbing, try to let the tip of the club touch the marker as much as possible to gradually increase the amplitude of the climb. You can also do some rotation exercises, such as the rotation movements in yoga.
Enhance the flexibility and range of motion of the body, and at the same time, combine it with pole climbing exercises. Gradually overcome psychological barriers and increase the range of ascent.
Practical tip: When practicing, coordinate the upward movement with your breathing. Inhale when climbing the pole and feel the relaxation of your body. One can also imitate the movement range and rhythm of professional players by watching their top shot videos.
Notes: When increasing the amplitude of the bar, do it gradually to avoid excessive stretching that may cause muscle strain. Pay attention to the coordination of all parts of your body when climbing the pole. Don’t just focus on the movements of your arms or shoulders.
Errors In Lowering The Club And Hitting The Ball: Deviation In Force Application, Difficulty In Finding Precision
When lowering the bar, many beginners wrongly focus their force application on the arm. However, the importance of body rotation and the shift of the center of gravity has been ignored. Hitting the ball merely by arm strength is like prying a huge rock with a small stick; the force seems insignificant.
Moreover, this way of exerting force is difficult to ensure the accuracy of the hitting direction. The ball often deviates from the target and flies in an unexpected direction.
Correction method: You can practice lowering the bar and turning the hips. Place a ball stand or other markers on the practice ground. Stand behind the marker and rotate your hips first when lowering the pole. Drive your upper body and arms to hit the ball, and try to let the club pass over the marker as much as possible.
Practice repeatedly to experience the feeling of driving the whole body to exert force with the hips as the axis. You can also do some resistance exercises, such as using an elastic band and fixing one end of it. Put the other end on the waist and practice the lower bar. Feel the way of exerting force to overcome resistance when the body rotates and strengthen the correct habit of exerting force.
Practical tip: When lowering the pole, imagine your body as a spinning top. Start from the lower body and drive the upper body and the club. At the moment of hitting the ball, the wrist is released quickly to increase the speed of the clubhead.
Note: The descent speed should gradually increase from slow to fast to avoid applying excessive force at the very beginning. After hitting the ball, maintain the balance and posture of your body and complete the full swing action.
Beginners often have problems in controlling the hitting point as well. If the hitting point is too high or too low, the flight path of the ball will change and it will not fly along the expected route. When hitting the ball, if it fails to hit the center of the ball, it will cause the ball to rotate irregularly, affecting the stability and distance of its flight. These problems make each shot full of uncertainties and difficult to achieve precise shots.
Correction method: You can place a small piece of paper or a leaf behind the ball. When hitting the ball, try to let the club touch the ball first. Touch the paper again to train the accuracy of the hitting point. You can also practice marking the hitting point by marking a point on the ball with a colored pen.
Observe whether the marks on the ball are evenly erased after each hit. If only part of it is erased, it indicates that the hitting point is inaccurate. Through continuous adjustment, the accurate hitting point is gradually found.
Practical tip: When hitting the ball, focus your eyes on the lower back of the ball. Imagine the clubhead as a small hammer and strike the ball vertically downward. Practice hitting the ball at different distances and angles to improve your adaptability to the hitting point.
Note: Avoid raising your head too early when hitting the ball, which may affect the accuracy of the shot. If the hitting point is inaccurate continuously, stop to adjust your posture and mindset, and then start practicing again.
Psychological Factors At Play: Emotional Fluctuations Affect Performance

Mental state plays a crucial role in golf, but beginners are often easily disturbed by psychological factors. On the court, especially when there are others watching around, tension surges up like a tide.
Excessive tension can cause muscles to become stiff, originally proficient movements to become awkward and distorted, and the mind to go blank. Unable to perform at the level shown in training normally, every shot was filled with pressure and unease.
Correction method: Before hitting the ball, you can do deep breathing exercises. Inhale slowly and let the air fill your abdomen. Then exhale slowly and repeat several times to help relax the body and relieve tension. You can also give yourself positive psychological hints, telling yourself in your heart, “I can play this shot well” and “I’m fully prepared,” to enhance your self-confidence.
You can also take part in more small-scale competitions or play ball games with friends in your spare time. Gradually adapt to the environment where people are watching and reduce the sense of tension.
Practical tips: Establish your own exclusive hitting ceremony, such as making specific position adjustments or doing a simple swing rehearsal before hitting the ball. Stabilize emotions through a fixed sense of ritual. Focus your attention on the process of hitting the ball rather than the result to reduce your mental burden.
Note: The mentality of being eager for quick success is also a major obstacle for beginners. They are eager to achieve good results quickly and are reluctant to spend time and energy patiently practicing basic movements and mastering the correct rhythm.
Driven by this mentality, one blindly pursues the effect of hitting the ball. Frequent mistakes occur, which in turn leads to impatience. Falling into a vicious circle not only affects the improvement of one’s ball-playing skills. It also makes the learning process extremely painful.
Correction method: Make a reasonable study plan and break down the learning goals into small ones. For example, this week, focus on practicing the grip, and next week, practice the grip movement, etc. Each practice focuses on a small goal and gradually improves. Record your practice process and progress when you reach a small goal. Give yourself some small rewards to enhance your motivation and sense of achievement in learning.
At the same time, ask more experienced players for advice and understand their learning processes. Understand that improving golf skills requires time and patience, and keep a peaceful state of mind.
Practical tip: Join a golf learning group or community, exchange experiences with other beginners, and encourage each other. Read books and articles related to golf, learn from the experiences and insights of predecessors, and broaden one’s horizons.
Note: Avoid blindly comparing yourself with others. Everyone’s learning progress is different. When you encounter a bottleneck period, don’t be discouraged. Keep practicing and adjusting your methods to gradually break through.
Learning golf is a gradual process. Only when beginners fully recognize these common mistakes can they do so. And keep correcting during practice, pay attention to the standardization of basic movements, and adjust your mindset well.
At the same time, only by flexibly applying practical skills and keeping precautions in mind can one gradually get out of the misunderstandings. Show one’s style on the golf course.
If you encounter other problems during the learning process or want to know more ways to improve your ball skills. Welcome to communicate with me at any time. Let’s explore and progress together in the world of golf.
FAQS
How do I choose the right golf ball for my skill layer?
Beginners should start with two-layer balls for ease of use and affordability. Intermediate players might benefit from three-layer balls for better control.
Advanced players can explore four or five-layer options to enhance their performance.
Are more layers always better?
Not necessarily. While more layers can offer advanced performance features, they may not be suitable for every player.
Beginners might find multi-layer balls harder to control, while more experienced golfers can benefit from the added complexity.
What is Fuli lead time?
Usually, we ship orders in 2 weeks. But it will take a little longer if we have the heavy burden of production tasks. It also takes more time for customized products.
Can the weather affect the choice of golf ball?
Absolutely. In colder weather, a softer ball might provide better feel, while in warmer conditions, a firmer ball might maintain distance better.
Additionally, wet conditions may call for balls that offer better traction and control.
How often should I change my golf balls?
Golf balls should be replaced if they show visible signs of damage (scrapes, cuts) or if you notice a decline in performance.
Regular players may want to change balls every few rounds, while casual players can go longer.
Leave a Reply
Your email address will not be published. Required fields are marked *

Are you looking for
GOLF BALL?
Offers Suitable Golf For Wholesalers And Professionals
Hi. If you want to know about or purchase golf related products, please feel free to ask me any questions.